Administrators of VMware View 4.x and 5.x would know that View Manager would from time to time fail to complete operations with virtual desktops in pools and eventually leave orphaned or stale virtual desktops in pools that we cannot delete from the GUI. The following shows 2 stale desktops that View Manager would not allow us to delete:

Failed to delete VM – null

Although it’s possible for us to manually delete the virtual desktop from vCenter, this would not be enough to cleanly remove it from the VMware View Manager and its database:

Fortunately, VMware does provide the following KB to walk us through deleting the orphaned VDIs:
Manually deleting linked clones or stale virtual desktop entries from VMware View Manager 3.x and 4.0.x
http://kb.vmware.com/selfservice/microsites/search.do?language=en_US&cmd=displayKC&externalId=1008658
As I have had clean out quite a few virtual desktops this week, I found that while using the GUI for the SQL database modifications has its advantages (i.e. deleting multiple entries), it’s not very practical if you have thousands of desktops in the database because the GUI only allows you return 200 roles for editing. I’m not much of an expert with SQL but have done some work in the past (and in University) so I took this opportunity to shake off some of the dust and use simple queries to remove the entries from the database. As I have documented the process from start to finish, I figure I’d write this post so I can reference to it in the future.
Step #1 – Clean View ADAM Database
Begin by logging onto a View Connection Server and use the following KB to connect to the ADAM database:
http://kb.vmware.com/selfservice/microsites/search.do?cmd=displayKC&docType=kc&docTypeID=DT_KB_1_1&externalId=2012377


Name: View ADAM Database
Select or type a Distinguished Name or Naming Context: dc=vdi,dc=vmware,dc=int
Select or type a domain or server: localhost


Right click on View ADAM Database –> New –> Query…:

Enter a name for the query (I just use the VDI’s name) and modify the following query string:
(&(objectClass=pae-VM)(pae-displayname=VirtualMachineName))
… and change the VirtualMachineName to the orphaned VDI. Click on the Browse button and select Servers:


Your New Query window should look similar to the following:

Clicking OK in the new query will show a new query ADSI Edit listed in the tree:

Clicking on the query will show the result:

We’re interested in the CN value so double click on the object to open the properties. Double check that the pae-DisplayName correctly reflects the VDI name:

Copy the CN to notepad so you can reference it:


Navigate to the Servers OU, locate the entry with the same CN:

Open the object to double check that the pae-DisplayName is the name of the VDI you would like to delete:

Proceed to right click on the object and delete it:


Note that the desktops are now gone when you refresh the pool in the View Manager:

Step #2 – Delete entry in the dbo.SVI_VM_NAME table
Open SQL Server Management Studio and navigate to your View Composer database and locate the dbo.SVI_VM_NAME table:

What we would usally do as per the KB is to use the Edit Top 200 Rows to delete the entries:


If your View environment has more than 200 VDIs then this feature in the GUI may not work so instead of using the GUI, the following SQL query can be executed:
DELETE FROM dbo.SVI_VM_NAME
WHERE NAME='VIEW-122'

Modify the virtual desktop name as required.
Step #3 – Delete entry in the dbo.SVI_COMPUTER_NAME table
The next step is to delete the entry in the dbo.SVI_COMPUTER_NAME table:

Instead if using the GUI, you can use the following:
DELETE FROM dbo.SVI_COMPUTER_NAME
WHERE NAME='VIEW-122'
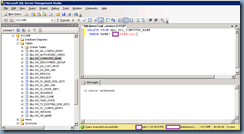
Step #4 (Optional) – Retrieve ID from the dbo.SVI_SIM_CLONE table to delete entry in dbo.SVI_SC_PDISK_INFO
Since the record in the dbo.SVI_SIM_CLONE has other other tables referencing it, we will need to obtain the ID of the record for the stale VDI and use it to delete records from the dbo.SVI_SC_PDISK_INFO table. One of the ways to obtain the ID is to use the following query:
SELECT *
FROM db.SVI_SIM_CLONE
WHERE VM_NAME=’VIEW-122’
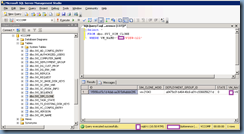
You can then manually copy this ID and paste it into other queries to delete the rows but this is prone to errors. The better way is to nest this query to minimize the chances of accidental typo errors.
Step #5 – Delete entry in dbo.SVI_SC_PDISK_INFO
The PARENT_ID value in the dbo.SVI_SC_PDISK_INFO:
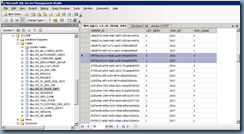
… is actually the ID value in the dbo.SVI_CLONE_VM so to delete the entry in dbo.SVI_SC_PDISK_INFO we can simply nest the query to retrieve the ID in the dbo.SVI_CLONE_VM:
DELETE FROM dbo.SVI_SC_PDISK_INFO
WHERE PARENT_ID=
(SELECT ID
FROM dbo.SVI_SIM_CLONE
WHERE VM_NAME='VIEW-122')
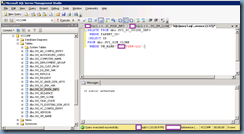
Step #6 – Delete entry in dbo.SVI_SC_BASE_DISK_KEYS
The dbo.SVI_SC_BASE_DISK_KEYS table:
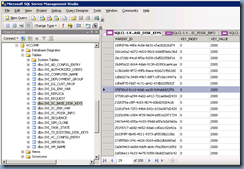
… is the same as the dbo.SVI_SC_PDISK_INFO table where the ID value in the dbo.SVI_CLONE_VM is used to delete the orphaned record so proceed to use the following query to remove the entry:
DELETE FROM dbo.SVI_SC_BASE_DISK_KEYS
WHERE PARENT_ID=
(SELECT ID
FROM dbo.SVI_SIM_CLONE
WHERE VM_NAME='VIEW-122')
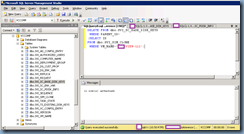
Step #7 – Delete entry in dbo.SVI_TASK_STATE
In order to clean out the stale entries in the table dbo.SVI_TASK_STATE, we will need to reference the ID in the dbo.SVI_SIM_CLONE table so proceed with using the following nested query:
DELETE FROM dbo.SVI_TASK_STATE
WHERE SIM_CLONE_ID=
(SELECT ID
FROM dbo.SVI_SIM_CLONE
WHERE VM_NAME='VIEW-122')
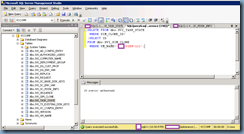
Step #7 – Delete entry in dbo.SVI_REQUEST
dbo.SVI_REQUEST table is the same as the dbo.SVI_TASK_STATE table where we’ll need to use the ID in the dbo.SVI_SIM_CLONE table to remove the entry so proceed with using the following nested query:
DELETE FROM dbo.SVI_REQUEST
WHERE ID=
(SELECT REQUEST_ID
FROM dbo.SVI_TASK_STATE
WHERE SIM_CLONE_ID=
(SELECT ID
FROM dbo.SVI_SIM_CLONE
WHERE VM_NAME='VIEW-122'))
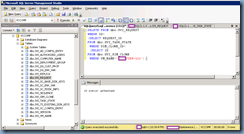
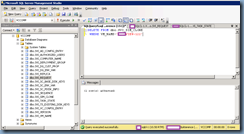
With the entries in the tables referencing the dbo.SVI_SIM_CLONE deleted, we can proceed with removing the entry in the dbo.SVI_SIM_CLONE table with the following query:
DELETE FROM dbo.SVI_SIM_CLONE
WHERE VM_NAME='VIEW-122'
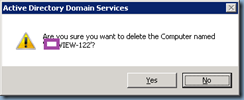
Step #8 – Delete Active Directory Account
Proceed with deleting the computer account in Active Directory:

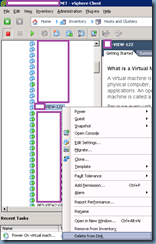
Step #9 – Delete VM from vCenter
Complete the removal by deleting the VM from vCenter:
-------------------------------------------------------------------------Update--------------------------------------------------------------------------------
I received a few requests to combine all of the SQL states together so I’ve taken all of the statements I outlined above and put them together. All we need to do with the following is perform a search and replace to replace the replaceMe string with the virtual desktop’s name:
DELETE FROM dbo.SVI_VM_NAME
WHERE NAME='replaceMe'
DELETE FROM dbo.SVI_COMPUTER_NAME
WHERE NAME='replaceMe'
DELETE FROM dbo.SVI_SC_PDISK_INFO
WHERE PARENT_ID=
(SELECT ID
FROM dbo.SVI_SIM_CLONE
WHERE VM_NAME='replaceMe')
DELETE FROM dbo.SVI_SC_BASE_DISK_KEYS
WHERE PARENT_ID=
(SELECT ID
FROM dbo.SVI_SIM_CLONE
WHERE VM_NAME='replaceMe')
DELETE FROM dbo.SVI_TASK_STATE
WHERE SIM_CLONE_ID=
(SELECT ID
FROM dbo.SVI_SIM_CLONE
WHERE VM_NAME='replaceMe')
DELETE FROM dbo.SVI_REQUEST
WHERE ID=
(SELECT REQUEST_ID
FROM dbo.SVI_TASK_STATE
WHERE SIM_CLONE_ID=
(SELECT ID
FROM dbo.SVI_SIM_CLONE
WHERE VM_NAME='replaceMe'))
DELETE FROM dbo.SVI_SIM_CLONE
WHERE VM_NAME='replaceMe'

![clip_image001[4] clip_image001[4]](http://lh3.ggpht.com/-WGBDYckQKAU/US-6vaDuYYI/AAAAAAAAamo/_fU0f9g84Ns/clip_image001%25255B4%25255D_thumb.png?imgmax=800)

![clip_image001[6] clip_image001[6]](http://lh6.ggpht.com/-nZqmZchmQQk/US-6xfrFniI/AAAAAAAAanI/fOYsj32nLZo/clip_image001%25255B6%25255D_thumb.png?imgmax=800)

![clip_image001[8] clip_image001[8]](http://lh5.ggpht.com/-ei9aIgkZqZE/US-6zD4h_RI/AAAAAAAAano/WQdJjpgo1Ik/clip_image001%25255B8%25255D_thumb.png?imgmax=800)
![clip_image001[10] clip_image001[10]](http://lh5.ggpht.com/-0NKxbqNIwR0/US-60M9NLXI/AAAAAAAAan4/WR_se5txhhw/clip_image001%25255B10%25255D_thumb.png?imgmax=800)
![clip_image001[12] clip_image001[12]](http://lh5.ggpht.com/-XM8BkmTw53I/US-600Dq7OI/AAAAAAAAaoI/D14fFS1Evus/clip_image001%25255B12%25255D_thumb.png?imgmax=800)
![clip_image001[14] clip_image001[14]](http://lh6.ggpht.com/-ciWL5NNTwHk/US-62o9s1CI/AAAAAAAAaoY/FjQznUs4qD4/clip_image001%25255B14%25255D_thumb.png?imgmax=800)

![clip_image001[16] clip_image001[16]](http://lh5.ggpht.com/-ETxPEsPF5nc/US-66QTAFGI/AAAAAAAAao4/Rh-PchVckHY/clip_image001%25255B16%25255D_thumb.png?imgmax=800)

![clip_image001[18] clip_image001[18]](http://lh3.ggpht.com/-He3ZKFVEsRE/US-69g5l-WI/AAAAAAAAapY/tpMCQ3KKbeU/clip_image001%25255B18%25255D_thumb.png?imgmax=800)
![clip_image001[20] clip_image001[20]](http://lh4.ggpht.com/-pLTrG3G5N-o/US-7AYAD_fI/AAAAAAAAapo/aXe6MHB2_Wc/clip_image001%25255B20%25255D_thumb.png?imgmax=800)
![clip_image001[22] clip_image001[22]](http://lh6.ggpht.com/-Mk0vYa1UA4g/US-7BkxoR1I/AAAAAAAAap4/BHto0dQ1Ric/clip_image001%25255B22%25255D_thumb.png?imgmax=800)
![clip_image001[24] clip_image001[24]](http://lh3.ggpht.com/-7M15D1-XOuw/US-7C64McVI/AAAAAAAAaqI/fa7ttY2jnk8/clip_image001%25255B24%25255D_thumb.png?imgmax=800)
![clip_image001[26] clip_image001[26]](http://lh5.ggpht.com/-nW1aEGNi4kM/US-7D3qC_aI/AAAAAAAAaqY/zU6Qgwn48DM/clip_image001%25255B26%25255D_thumb.png?imgmax=800)
![clip_image001[28] clip_image001[28]](http://lh4.ggpht.com/-S8xOs4oT_tg/US-7EnGGFxI/AAAAAAAAaqo/H8IIA4hKUe4/clip_image001%25255B28%25255D_thumb.png?imgmax=800)
![clip_image001[30] clip_image001[30]](http://lh3.ggpht.com/-mGlKxAmLaOk/US-7FQoaqkI/AAAAAAAAaq4/CqNiNGJBFjc/clip_image001%25255B30%25255D_thumb.png?imgmax=800)
![clip_image001[32] clip_image001[32]](http://lh5.ggpht.com/-LjDun_lLGYo/US-7GgJTBRI/AAAAAAAAarI/CYXawKnDur8/clip_image001%25255B32%25255D_thumb.png?imgmax=800)
![clip_image001[34] clip_image001[34]](http://lh5.ggpht.com/-gUN8_kJOfh0/US-7Hue3x9I/AAAAAAAAarY/MN8TcuJKtIk/clip_image001%25255B34%25255D_thumb.png?imgmax=800)
![clip_image001[36] clip_image001[36]](http://lh3.ggpht.com/-ILtPIXvMFdI/US-7Igkh-pI/AAAAAAAAaro/RxJqwcWbM0Y/clip_image001%25255B36%25255D_thumb.png?imgmax=800)


![clip_image001[38] clip_image001[38]](http://lh5.ggpht.com/-tPnVJCQyTgE/US-7O0WSofI/AAAAAAAAaso/GHaflgnjnUY/clip_image001%25255B38%25255D_thumb.png?imgmax=800)


