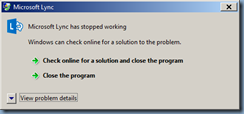
Problem
You’ve configured federation between two Lync Server 2013 environments and noticed that one of the organizations can send instant messages and see presence information but the other one cannot. The following is the organization that can send instant messages and see presence:

While the other company displays a globe indicating that the user is a federated contact and is able to receive messages, presence information is labeled as “unknown”:
![clip_image001[4] clip_image001[4]](http://lh6.ggpht.com/-Hqw2it198fw/UXiG7C1NWgI/AAAAAAAAcbk/vUdAzoJRFIk/clip_image001%25255B4%25255D_thumb.png?imgmax=800)
An attempt to send a message to this federated contact will display spinning dots:
![clip_image001[6] clip_image001[6]](http://lh4.ggpht.com/-jddDvLlN11A/UXiG83QgvgI/AAAAAAAAcb0/VgiqlGzUw0E/clip_image001%25255B6%25255D_thumb.png?imgmax=800)
… then subsequently fail with the message:
When contacting your support team, reference error ID 504 (source ID 239).
Troubleshooting information is available online, including best practices for using Lync.
Test
When contacting your support team, reference error ID 1 (source ID 0).
Troubleshooting information is available online, including best practices for using Lync.
![clip_image001[8] clip_image001[8]](http://lh5.ggpht.com/-zJTCBXfsVOo/UXiG9zLhTFI/AAAAAAAAccE/d3oREPiMfjI/clip_image001%25255B8%25255D_thumb.png?imgmax=800)
A quick debugging session with the logging tool on the front end server of the user who is unable to send or see presence information will show the following:
TL_INFO(TF_PROTOCOL) [0]0C88.14F4::04/24/2013-22:53:16.498.0000358e (SIPStack,SIPAdminLog::ProtocolRecord::Flush:2387.idx(196))[2663723319] $$begin_record
Trace-Correlation-Id: 2663723319
Instance-Id: 271E
Direction: incoming
Peer: svrgalyncedge01.ganet.internal:5061
Message-Type: response
Start-Line: SIP/2.0 430 Flow Failed
From: <sip:tluk@lyncNOT-WorkingDomain.bm>;tag=BE180080
To: <sip:tluk@lyncWorkingDomain.bm>;tag=0da93f28e3;epid=c0f4c0bf1f
Call-ID: 6c22e601bf384fbcb7aad1e83cf0ce57
CSeq: 2 NOTIFY
Via: SIP/2.0/TLS 10.99.1.33:54576;branch=z9hG4bK233B2AEC.2289D0E28FA1DC67;branched=FALSE;ms-received-port=54576;ms-received-cid=900
Content-Length: 0
ms-diagnostics: 1046;reason="Failed to connect to a federated peer server";fqdn="sip.lyncWorkingDomain.bm";peer-type="FederatedPartner";winsock-code="10060";winsock-info="The peer did not respond to the connection attempt";source="sip.lyncNOT-WorkingDomain.bm"

TL_INFO(TF_PROTOCOL) [0]0C88.14F4::04/24/2013-22:53:16.529.0000391f (SIPStack,SIPAdminLog::ProtocolRecord::Flush:2387.idx(196))[3715596209] $$begin_record
Trace-Correlation-Id: 3715596209
Instance-Id: 271F
Direction: incoming
Peer: svrgalyncedge01.ganet.internal:5061
Message-Type: response
Start-Line: SIP/2.0 504 Server time-out
From: "Terence Luk"<sip:tluk@lyncNOT-WorkingDomain.bm>;tag=8831ef87b3;epid=5f9c85c89d
To: "Terence Luk"<sip:tluk@lyncWorkingDomain.bm>;tag=0d2e9aac10;epid=c0f4c0bf1f
Call-ID: 9ff1cec1aa4e45cb89a737719a3a64dd
CSeq: 8 INFO
Via: SIP/2.0/TLS 10.99.1.33:54576;branch=z9hG4bK80E90095.A9B38655901FAC69;branched=FALSE;ms-received-port=54576;ms-received-cid=900
Via: SIP/2.0/TLS 10.99.1.33:49485;ms-received-port=49485;ms-received-cid=400
Content-Length: 0
ms-diagnostics: 1046;reason="Failed to connect to a federated peer server";fqdn="sip.lyncWorkingDomain.bm";peer-type="FederatedPartner";winsock-code="10060";winsock-info="The peer did not respond to the connection attempt";source="sip.lyncNOT-WorkingDomain.bm"

TL_INFO(TF_DIAG) [0]0C88.14F4::04/24/2013-22:53:16.529.00003e8a (SIPStack,SIPAdminLog::WriteDiagnosticEvent:1198.idx(778))[3715596209] $$begin_record
Severity: information
Text: Response successfully routed
SIP-Start-Line: SIP/2.0 504 Server time-out
SIP-Call-ID: 9ff1cec1aa4e45cb89a737719a3a64dd
SIP-CSeq: 8 INFO
Peer: 10.99.1.33:49485
Data: destination=tluk@lyncNOT-WorkingDomain.bm

TL_INFO(TF_PROTOCOL) [0]0C88.14F4::04/24/2013-22:53:16.529.00003ee0 (SIPStack,SIPAdminLog::ProtocolRecord::Flush:2387.idx(196))[3715596209] $$begin_record
Trace-Correlation-Id: 3715596209
Instance-Id: 271F
Direction: outgoing
Peer: 10.99.1.33:49485
Message-Type: response
Start-Line: SIP/2.0 504 Server time-out
From: "Terence Luk"<sip:tluk@lyncNOT-WorkingDomain.bm>;tag=8831ef87b3;epid=5f9c85c89d
To: "Terence Luk"<sip:tluk@lyncWorkingDomain.bm>;tag=0d2e9aac10;epid=c0f4c0bf1f
Call-ID: 9ff1cec1aa4e45cb89a737719a3a64dd
CSeq: 8 INFO
Via: SIP/2.0/TLS 10.99.1.33:49485;ms-received-port=49485;ms-received-cid=400
Content-Length: 0
ms-diagnostics: 1046;reason="Failed to connect to a federated peer server";fqdn="sip.lyncWorkingDomain.bm";peer-type="FederatedPartner";winsock-code="10060";winsock-info="The peer did not respond to the connection attempt";source="sip.lyncNOT-WorkingDomain.bm"
![clip_image001[10] clip_image001[10]](http://lh6.ggpht.com/-x-bc15iCEvM/UXiHGsJzjEI/AAAAAAAAcdE/36U3a6bB3ZY/clip_image001%25255B10%25255D_thumb.png?imgmax=800)
Solution
After reviewing the logs, I decided to test the port connectivity from the Edge servers and noticed that the Edge server for the organization that wasn’t able to send messages or see presence information was unable to telnet to the federated partner’s Edge server SIP URL via port 5061 even though it was able to connect via 443. This began to make sense as the problematic organization could see the globe indicating the contact was a federated partner but was unable to message or see presence information. A quick change in the firewall rule and confirming that the Edge server for the problematic organization was able to connect via port 5061 corrected this problem.
![clip_image001[12] clip_image001[12]](http://lh6.ggpht.com/-FYj3JJnw1BQ/UXiHHlIHpSI/AAAAAAAAcdU/1vEkML3HMmE/clip_image001%25255B12%25255D_thumb.png?imgmax=800)
![clip_image001[14] clip_image001[14]](http://lh6.ggpht.com/-Ro4gjd0799k/UXiHIVNM4aI/AAAAAAAAcdk/Hbp7C6kYBOA/clip_image001%25255B14%25255D_thumb.png?imgmax=800)

![clip_image001[4] clip_image001[4]](http://lh6.ggpht.com/-6Z7v4Qa9i4Q/UXu49DBagBI/AAAAAAAAcgE/5oHt4ktksBA/clip_image001%25255B4%25255D_thumb.png?imgmax=800)

![clip_image001[6] clip_image001[6]](http://lh3.ggpht.com/-ev21sZZlPZg/UXu5FJKPmfI/AAAAAAAAcgk/l3IUJgAhXvU/clip_image001%25255B6%25255D_thumb.png?imgmax=800)


![clip_image001[4] clip_image001[4]](http://lh5.ggpht.com/-4stqtaUJ7A0/UXr23lXccbI/AAAAAAAAcec/q32Opo-RezE/clip_image001%25255B4%25255D_thumb.png?imgmax=800)
![clip_image001[6] clip_image001[6]](http://lh3.ggpht.com/-D73JchJacpQ/UXr24mWiVII/AAAAAAAAces/ta2TdVJsIKA/clip_image001%25255B6%25255D_thumb.png?imgmax=800)
![clip_image001[8] clip_image001[8]](http://lh5.ggpht.com/-J7T_DwQHvZc/UXr25nYccLI/AAAAAAAAce8/QuuQESmMlWw/clip_image001%25255B8%25255D_thumb.png?imgmax=800)
![clip_image001[10] clip_image001[10]](http://lh6.ggpht.com/-3XRITU4tnq8/UXr267bMGII/AAAAAAAAcfM/ax0W8qWufw4/clip_image001%25255B10%25255D_thumb.png?imgmax=800)
![clip_image001[12] clip_image001[12]](http://lh3.ggpht.com/-QqrFbY6aOj0/UXr28SIXqkI/AAAAAAAAcfc/LHYvqtB0wGA/clip_image001%25255B12%25255D_thumb.png?imgmax=800)

![clip_image001[4] clip_image001[4]](http://lh6.ggpht.com/-Hqw2it198fw/UXiG7C1NWgI/AAAAAAAAcbk/vUdAzoJRFIk/clip_image001%25255B4%25255D_thumb.png?imgmax=800)
![clip_image001[6] clip_image001[6]](http://lh4.ggpht.com/-jddDvLlN11A/UXiG83QgvgI/AAAAAAAAcb0/VgiqlGzUw0E/clip_image001%25255B6%25255D_thumb.png?imgmax=800)
![clip_image001[8] clip_image001[8]](http://lh5.ggpht.com/-zJTCBXfsVOo/UXiG9zLhTFI/AAAAAAAAccE/d3oREPiMfjI/clip_image001%25255B8%25255D_thumb.png?imgmax=800)


![clip_image001[10] clip_image001[10]](http://lh6.ggpht.com/-x-bc15iCEvM/UXiHGsJzjEI/AAAAAAAAcdE/36U3a6bB3ZY/clip_image001%25255B10%25255D_thumb.png?imgmax=800)
![clip_image001[12] clip_image001[12]](http://lh6.ggpht.com/-FYj3JJnw1BQ/UXiHHlIHpSI/AAAAAAAAcdU/1vEkML3HMmE/clip_image001%25255B12%25255D_thumb.png?imgmax=800)
![clip_image001[14] clip_image001[14]](http://lh6.ggpht.com/-Ro4gjd0799k/UXiHIVNM4aI/AAAAAAAAcdk/Hbp7C6kYBOA/clip_image001%25255B14%25255D_thumb.png?imgmax=800)


![clip_image001[4] clip_image001[4]](http://lh3.ggpht.com/-ZHzMoyQIUrU/UW_VIZXKFpI/AAAAAAAAcUs/J5Or3FQnhns/clip_image0014_thumb.png?imgmax=800)
![clip_image001[6] clip_image001[6]](http://lh5.ggpht.com/-chOA5P4SGJ4/UW_VJPndYrI/AAAAAAAAcU8/6VrJSJGkFKQ/clip_image0016_thumb.png?imgmax=800)
![clip_image001[8] clip_image001[8]](http://lh6.ggpht.com/-5XKNX9cfs1A/UW_WHT1B76I/AAAAAAAAcVM/dCIdcSKqpXc/clip_image0018_thumb.png?imgmax=800)


![clip_image001[10] clip_image001[10]](http://lh5.ggpht.com/-d9oJ6szzQV0/UW_WN6-y8XI/AAAAAAAAcWc/aoG38AXG_Cw/clip_image00110_thumb.png?imgmax=800)
![clip_image001[12] clip_image001[12]](http://lh5.ggpht.com/-oojL__oDw2w/UW_WOqpnSOI/AAAAAAAAcWs/5OsgAf9FIaU/clip_image00112_thumb.png?imgmax=800)
![clip_image001[14] clip_image001[14]](http://lh4.ggpht.com/-jKUiAvr7gNg/UW_WPtsqSdI/AAAAAAAAcW8/zlhvk4ddclg/clip_image00114_thumb.png?imgmax=800)
![clip_image001[16] clip_image001[16]](http://lh6.ggpht.com/-RAEa0qRbrDE/UW_WQiRU1pI/AAAAAAAAcXM/UKBhbXVJzhc/clip_image00116_thumb.png?imgmax=800)
![clip_image001[18] clip_image001[18]](http://lh6.ggpht.com/-rb4iYjKGUfs/UW_WRtuUvXI/AAAAAAAAcXc/tptXWoxN0to/clip_image00118_thumb.png?imgmax=800)
![clip_image001[20] clip_image001[20]](http://lh3.ggpht.com/-0CfoLc3Spbs/UW_WSgAdt2I/AAAAAAAAcXs/YxR0mAVXHPw/clip_image00120_thumb.png?imgmax=800)
![clip_image001[22] clip_image001[22]](http://lh6.ggpht.com/-VniV9WlJcMw/UW_WTnKwDGI/AAAAAAAAcX8/jSHg-g2Q-k0/clip_image00122_thumb.png?imgmax=800)

![clip_image001[24] clip_image001[24]](http://lh4.ggpht.com/-tiYygvw_RvI/UW_WWAtYBfI/AAAAAAAAcYc/z-8ytkXm2AM/clip_image00124_thumb.png?imgmax=800)
![clip_image001[26] clip_image001[26]](http://lh6.ggpht.com/-_ZxCN-kSDgI/UW_WXC5Cj9I/AAAAAAAAcYs/_zuJJ7rMvvw/clip_image00126_thumb.png?imgmax=800)
![clip_image001[28] clip_image001[28]](http://lh3.ggpht.com/-ebY-P9mrFY0/UW_WYIw7FBI/AAAAAAAAcY8/AJexE3D_O2o/clip_image00128_thumb.png?imgmax=800)
![clip_image001[30] clip_image001[30]](http://lh4.ggpht.com/-crzbf7U6AWw/UW_WZZj3sWI/AAAAAAAAcZM/FFm2MIK6wOY/clip_image00130_thumb.png?imgmax=800)
![clip_image001[32] clip_image001[32]](http://lh4.ggpht.com/-vL64QECJLj4/UW_WaVsrP6I/AAAAAAAAcZc/ah1aDY5QW6A/clip_image00132_thumb.png?imgmax=800)
![clip_image001[34] clip_image001[34]](http://lh3.ggpht.com/-soEaux3oz-U/UW_WblbpQSI/AAAAAAAAcZs/Aj-0TrkmyGc/clip_image00134_thumb.png?imgmax=800)
![clip_image001[36] clip_image001[36]](http://lh5.ggpht.com/-YH9Lp32ozoQ/UW_WcpnbVNI/AAAAAAAAcZ8/4klSstPQ7_U/clip_image00136_thumb.png?imgmax=800)

![clip_image001[38] clip_image001[38]](http://lh6.ggpht.com/-8LraPo1Ll_w/UW_Wf6VDGuI/AAAAAAAAcac/djpZv_MZqPo/clip_image00138_thumb.png?imgmax=800)
![clip_image001[40] clip_image001[40]](http://lh6.ggpht.com/-2SWoM5JeMiU/UW_WhYiNCrI/AAAAAAAAcas/iojsc59cP2E/clip_image00140_thumb.png?imgmax=800)
![clip_image001[42] clip_image001[42]](http://lh5.ggpht.com/-Yt_StyRzwMw/UW_WjXKse1I/AAAAAAAAca8/D6gcV5ocqCQ/clip_image00142_thumb.png?imgmax=800)